Users are students/the people who will be using the career services. Visit All Users in the left menu to access your user management page. This page is where you go to view users, learn if they have accessed their account, understand who manages them, and track the group they are in.
Once you have added your first user(s), your screen will look similar to the one below.
To add a user, you will click the purple "add new user" in the top right corner.

This is a depiction of your user management center
Adding Users
You can add users manually (one-by-one) by clicking "Create user" or by clicking "Import User" and uploading a CSV.
Regardless of how you add users, you need to add up the following for each user:
- First name
- Last name
- Email address
💡
On the Import Users screen click "Download Template" to access a CSV file. You can use this optional template to create a list of users to upload.
After your account is initially set up, you can reference [ADD IN] if you need help adding users.
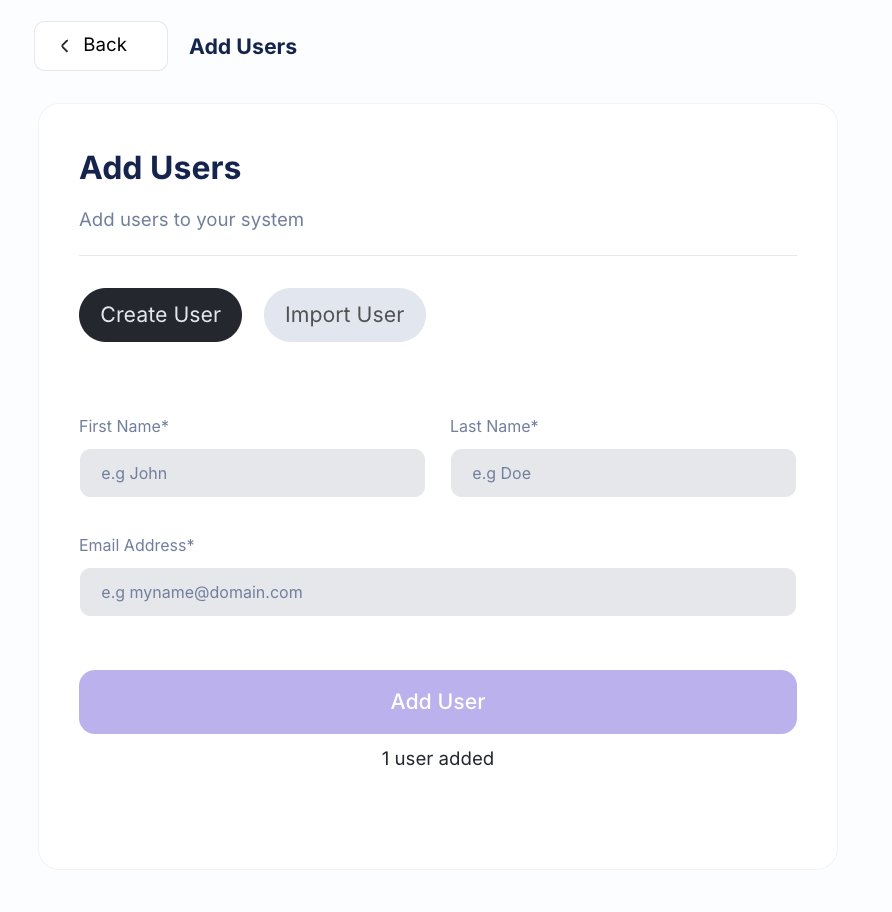
Click Create User to add one user at a time. Click Import User to upload a spreadsheet.
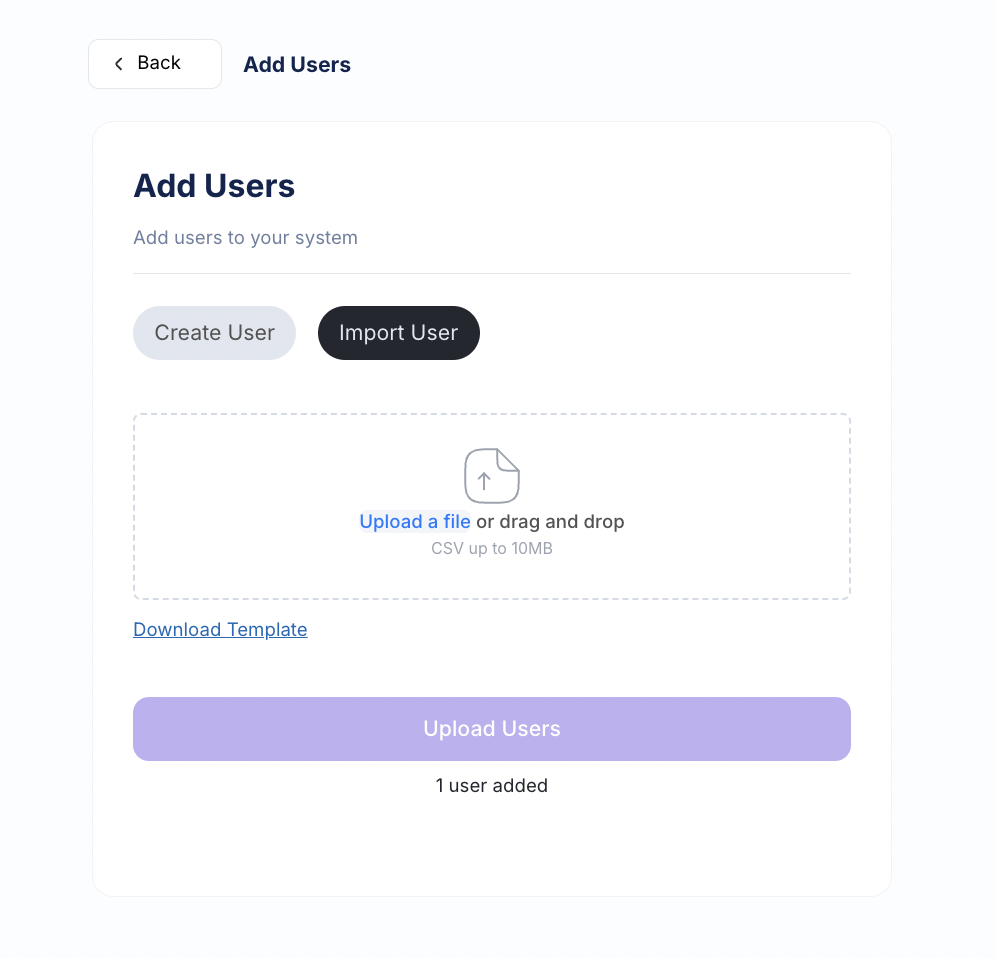
This is the screen you see when you click Import User.
User Sign Up Process
When you add a user, they will automatically receive a welcome email like this one below.
Note: The color scheme, logo, and contact information are based on the information you inputted during the 5-step set up process. You can change this anytime by visiting UI Customization in the left menu.
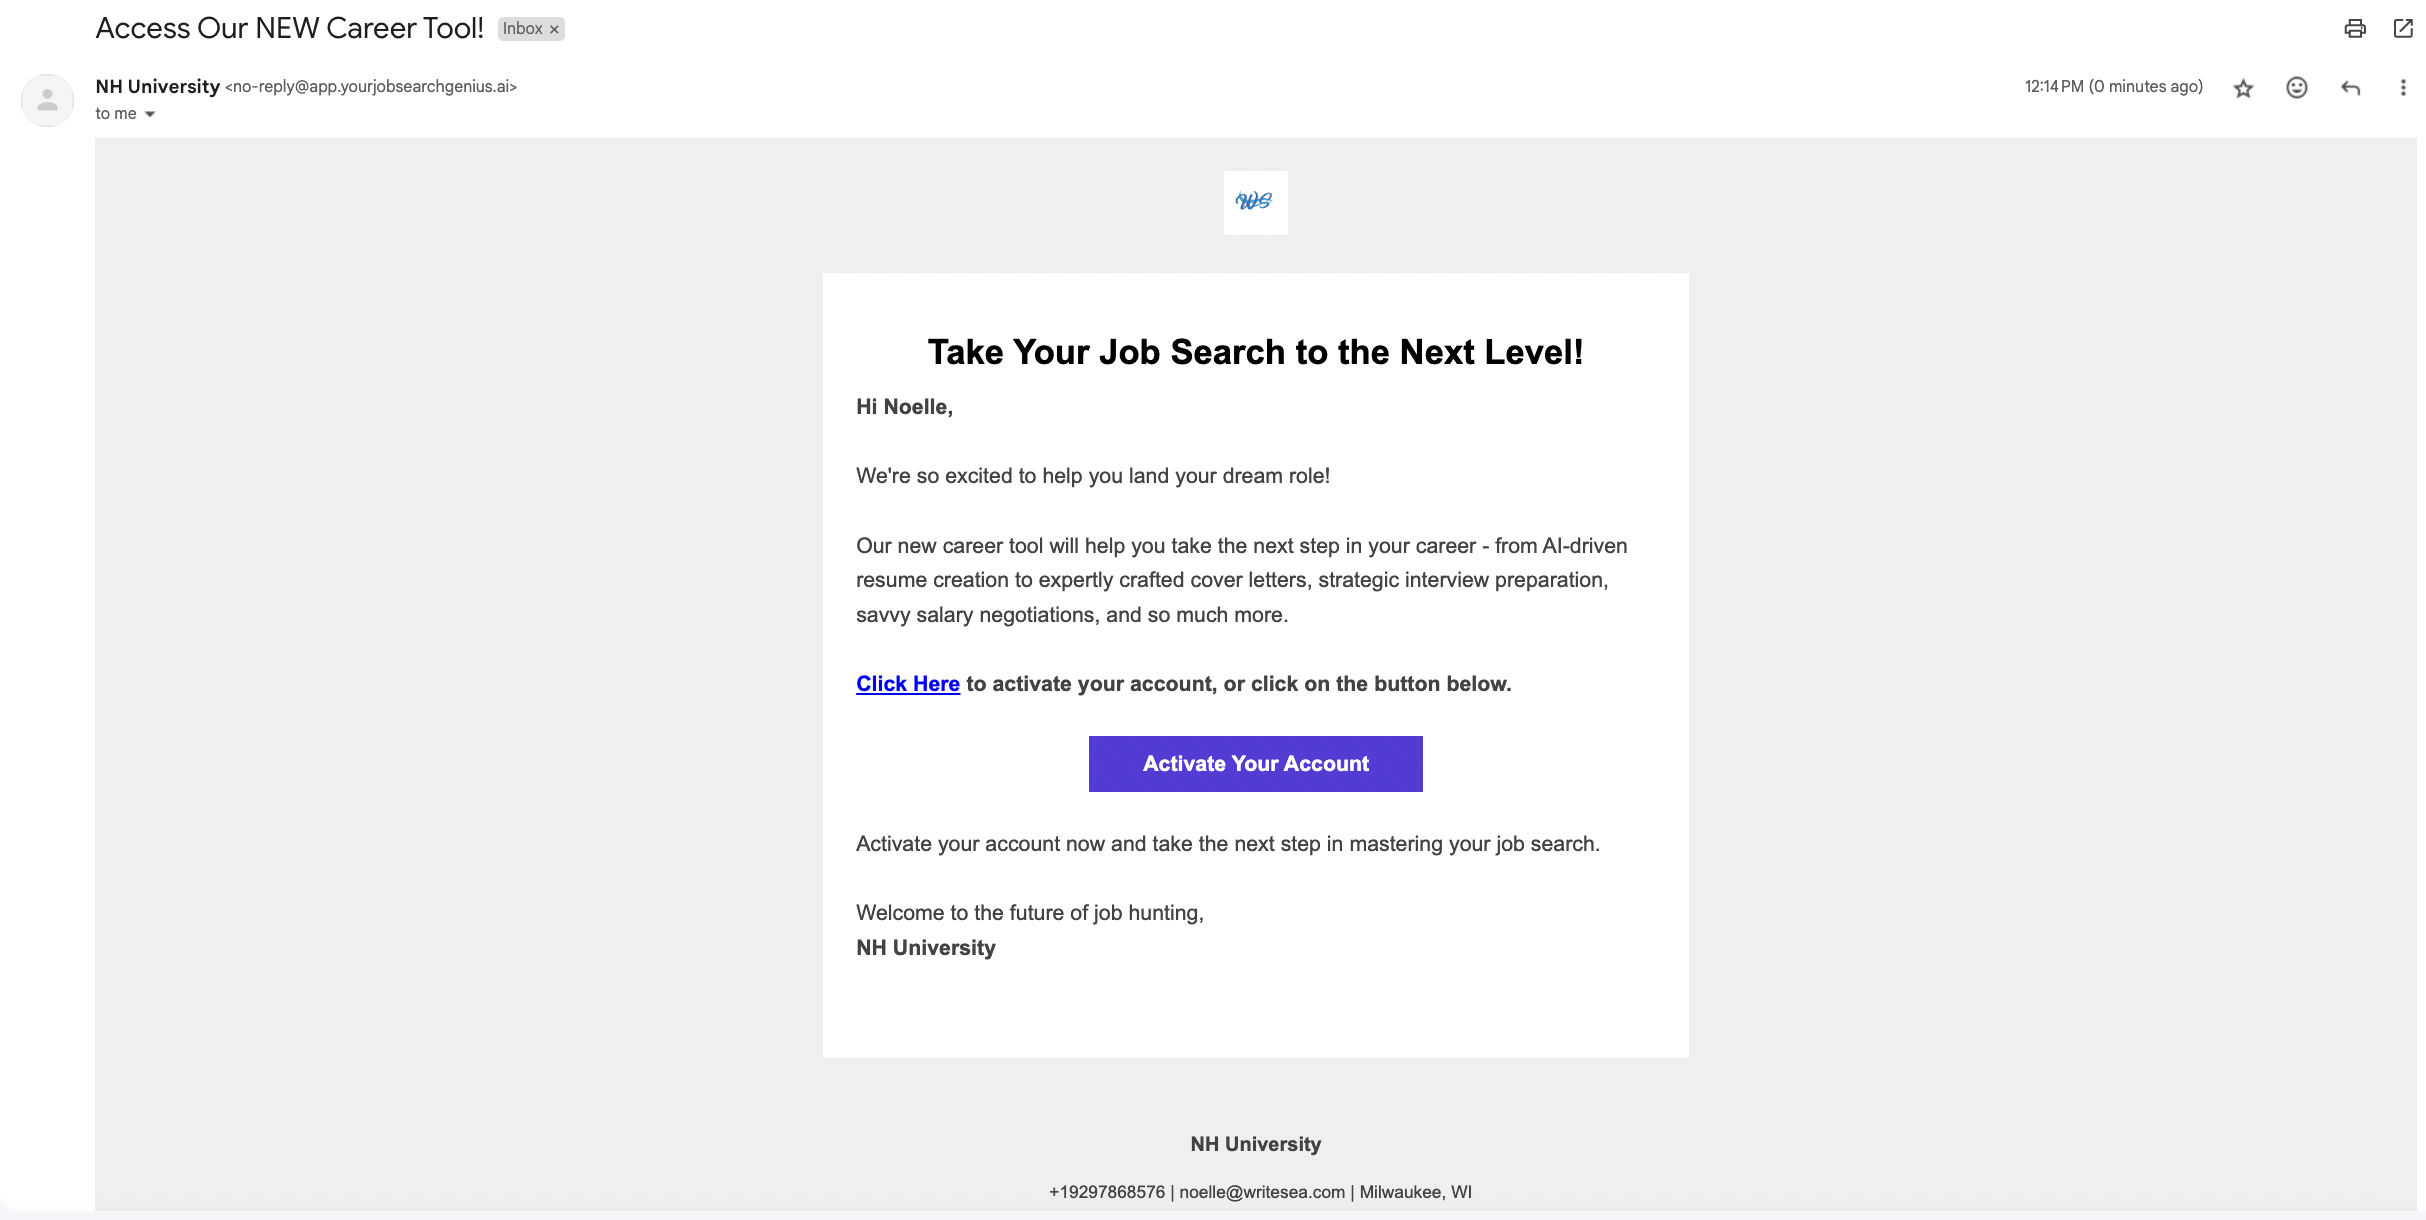
They will click "Activate Your Account" to create a password. They are required to use the email you set up their account with. Once they click the button in the email and create their password, they will be prompted to answer onboarding questions. These questions help you gather data about your users' goals and needs.
Managing Existing Users
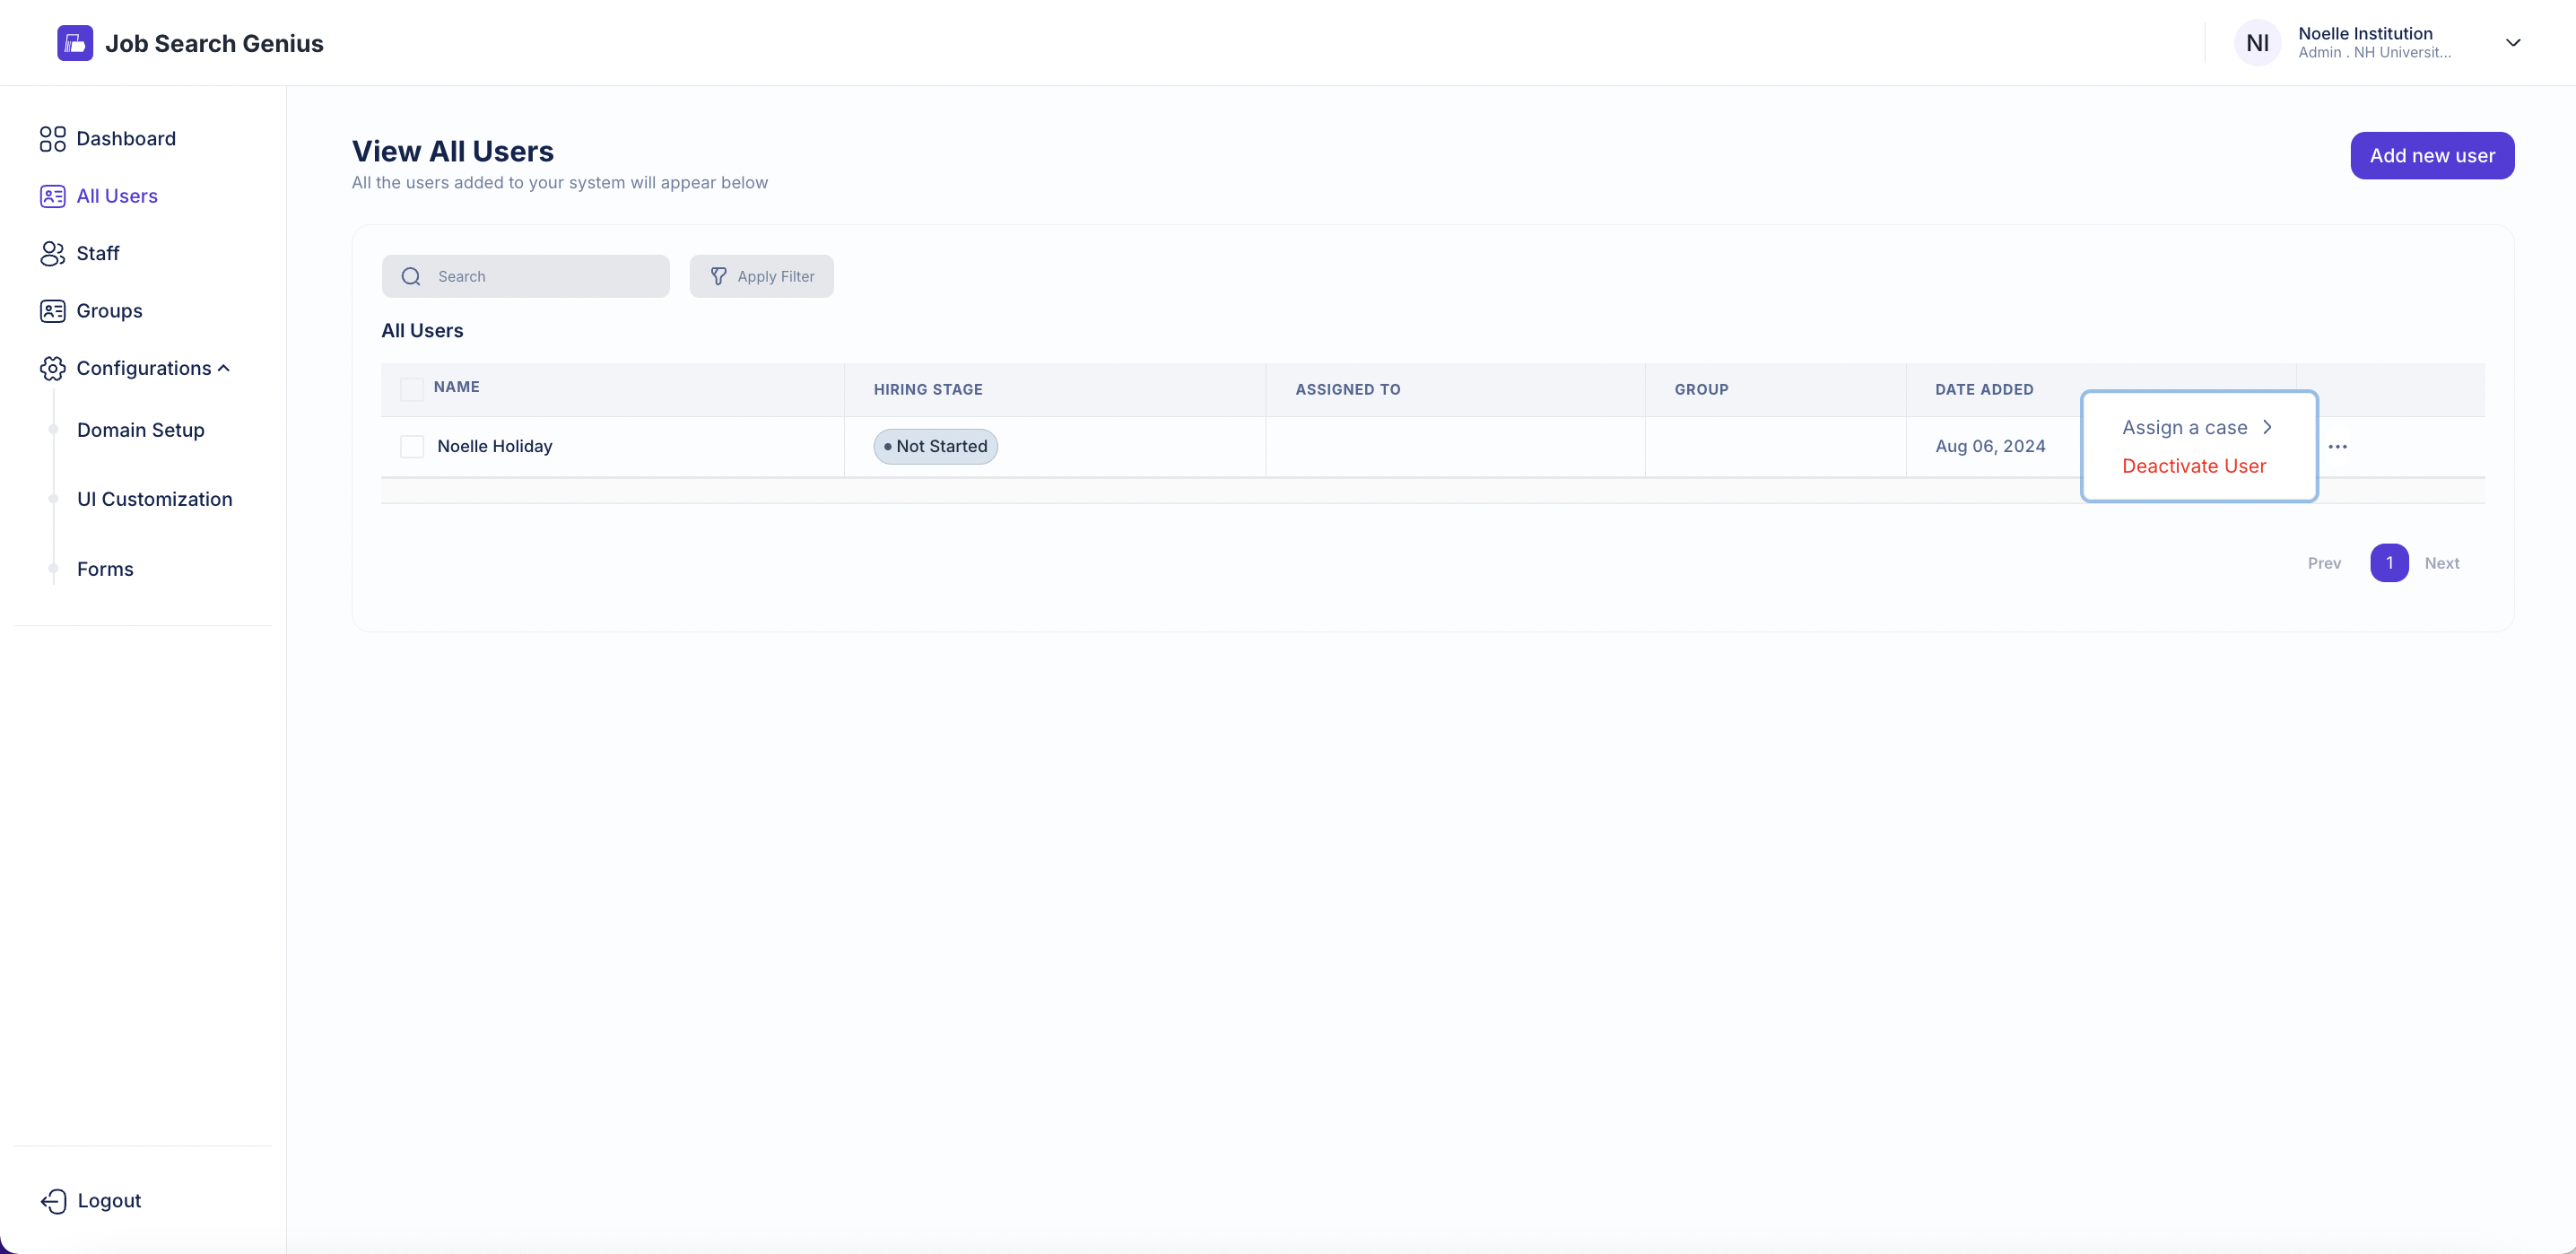
Your dashboard has several features to help you manage your users.
Deactivating a user. If you click the three dots on the right side of a user's row, you can deactivate their account.
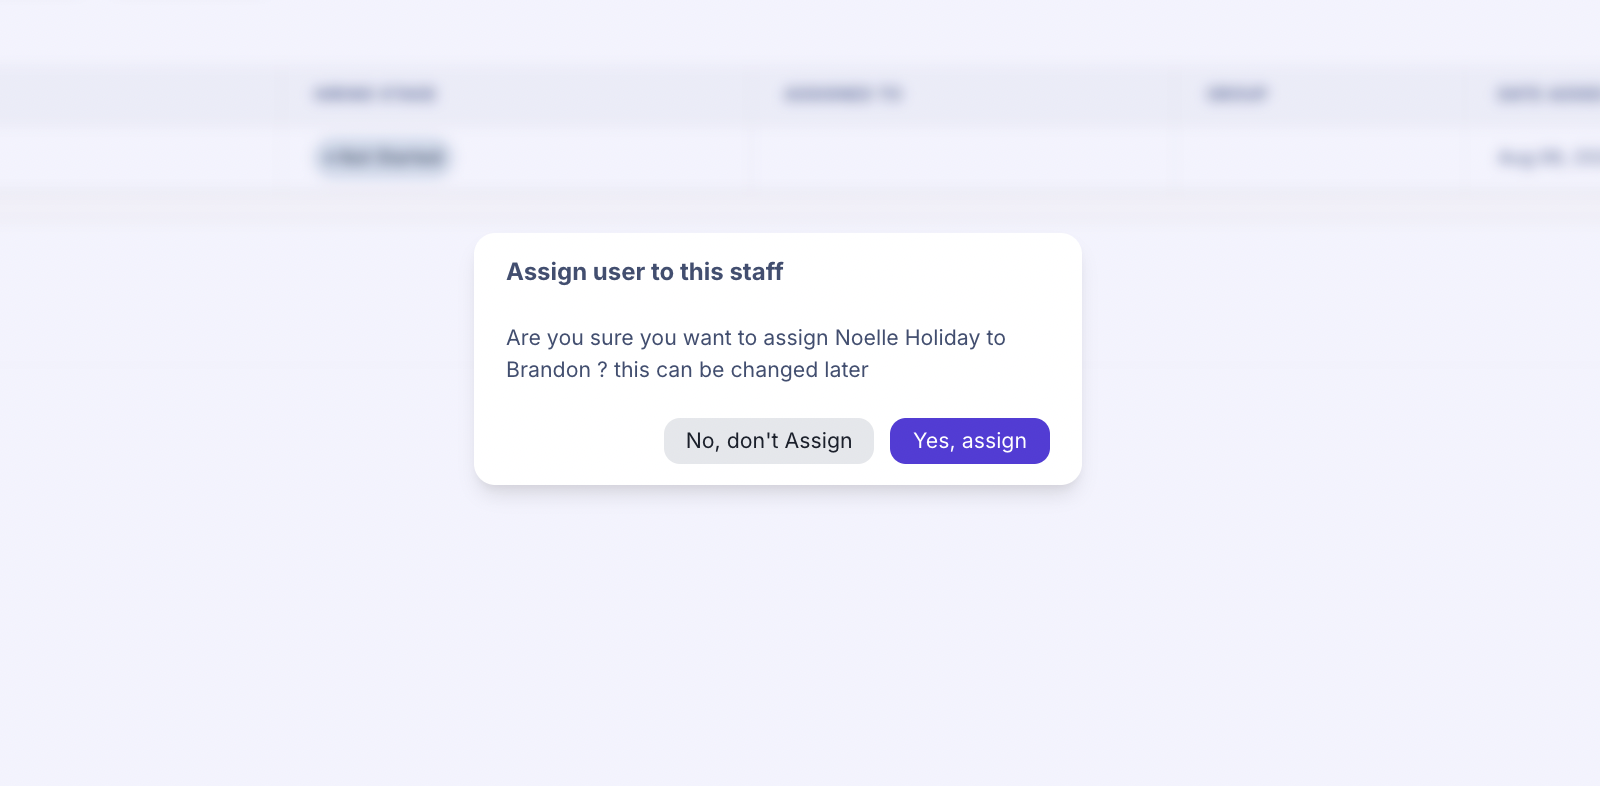
Assign a case. This feature allows you to assign a student to a staff member. If you have a staff member overseeing a class of 10 students, this feature will allow them to see their students in their own staff portal.
-
- The images below image show how a staff member's name (Brandon Mitchell) pops up when you hover over "assign a case" in the user's (Noelle Holiday) row. Here is the process:

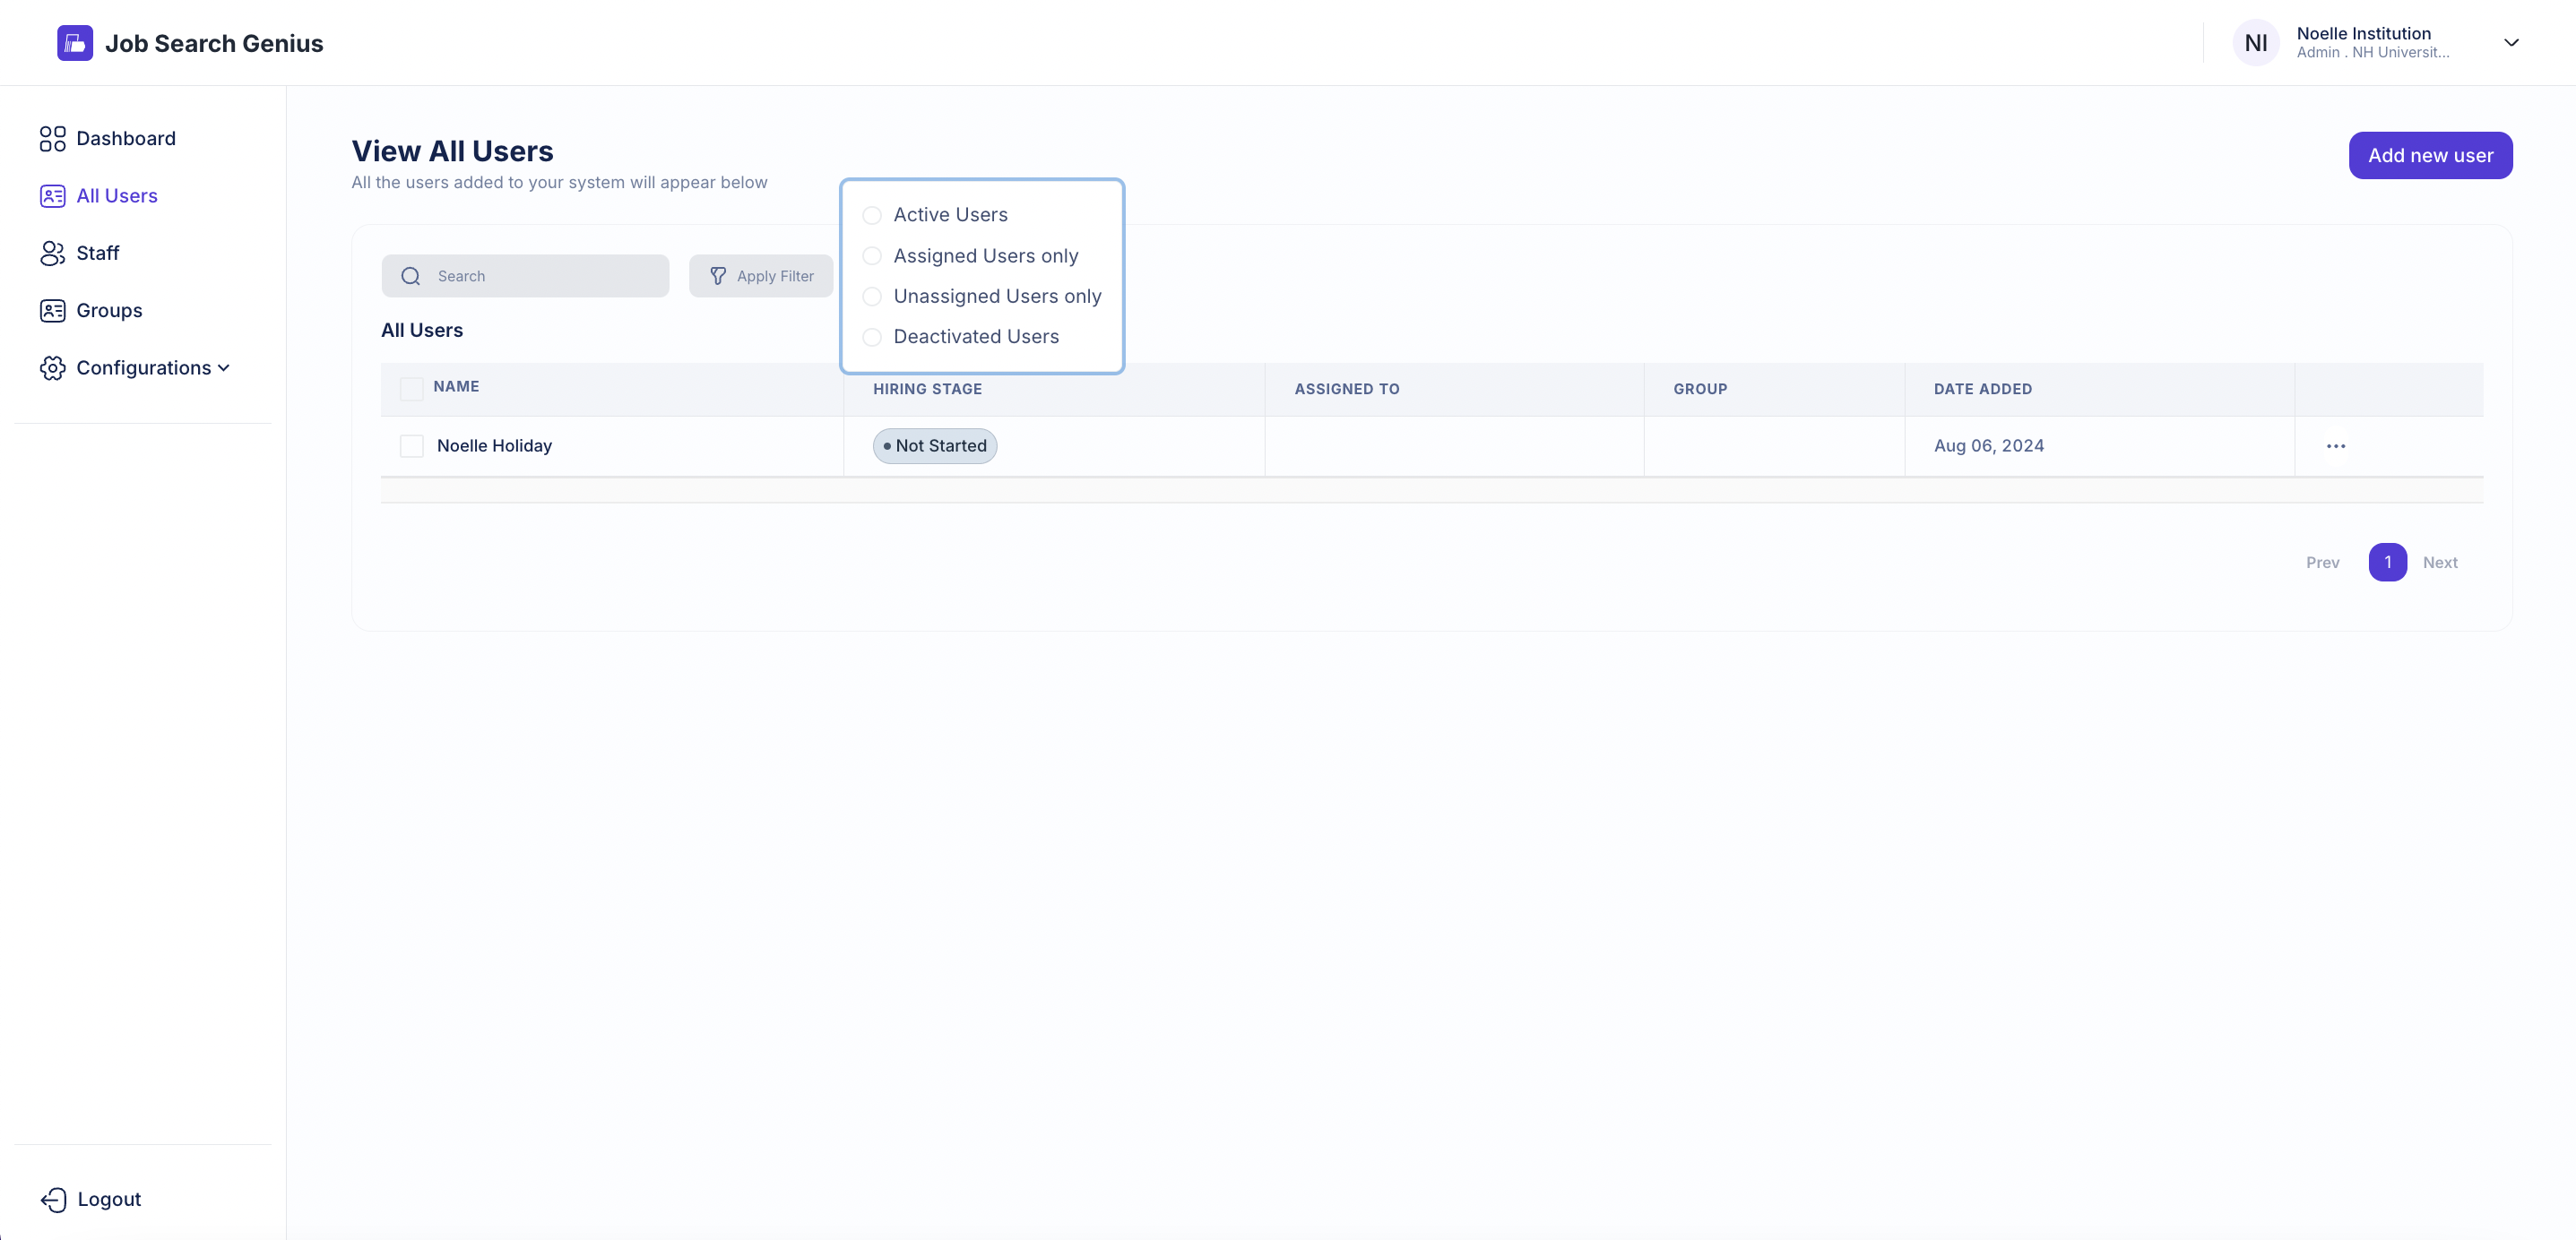
Applying filters. Filter the users you see by active, assigned, unassigned, and deactivated, as shown below.
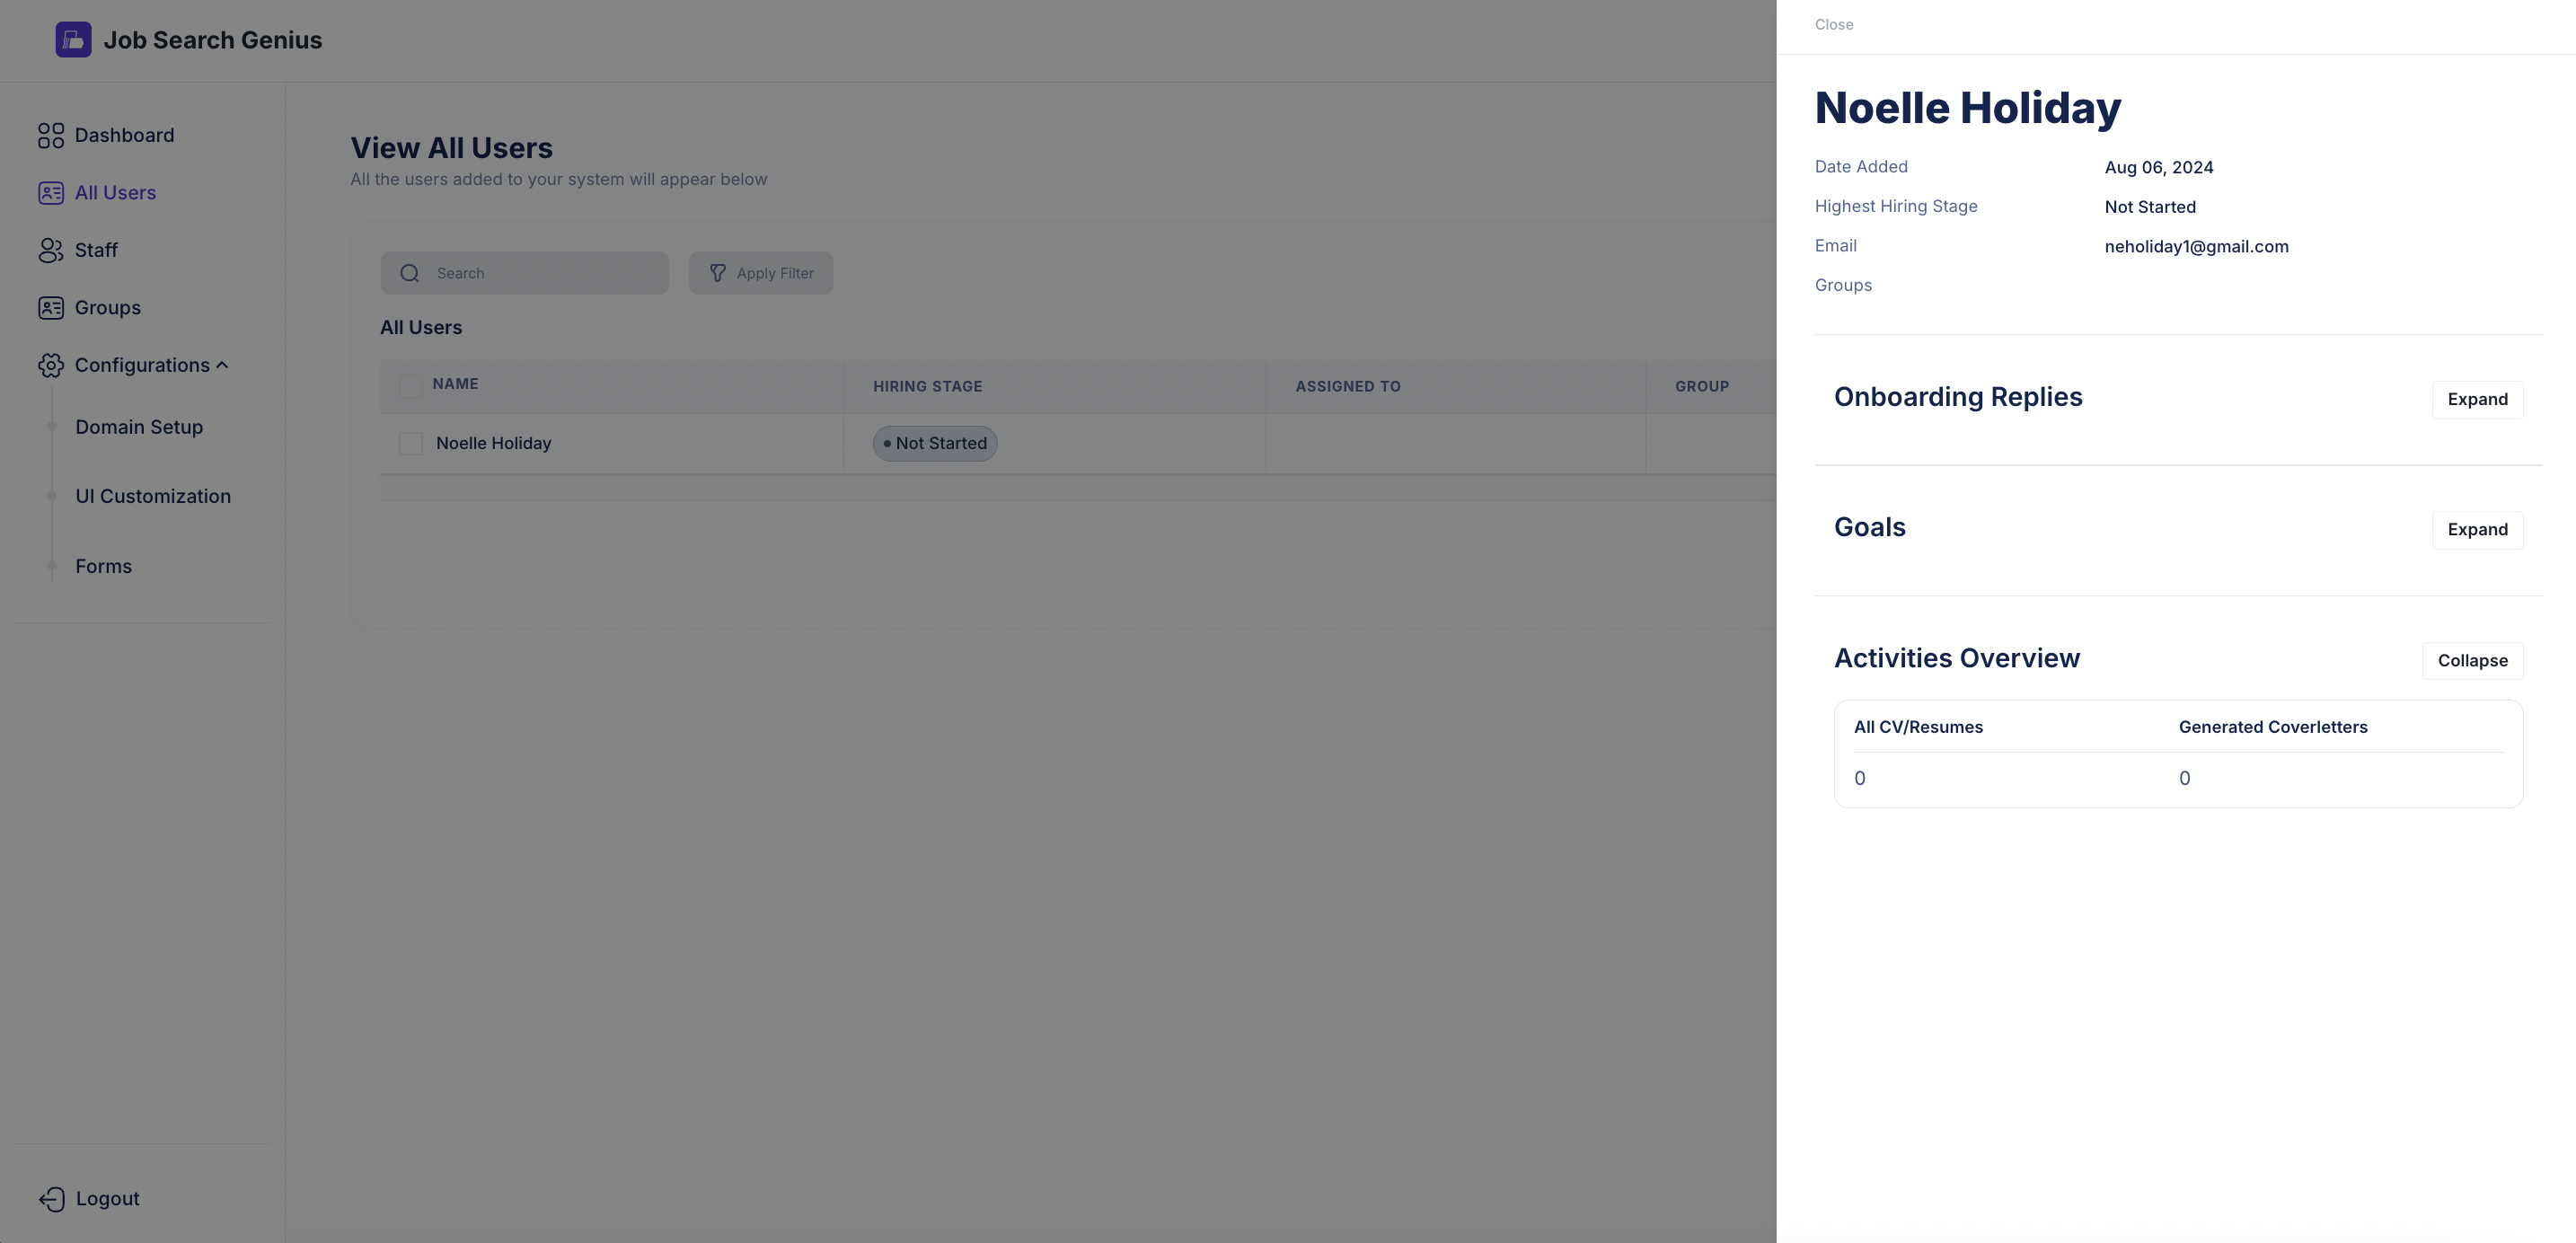
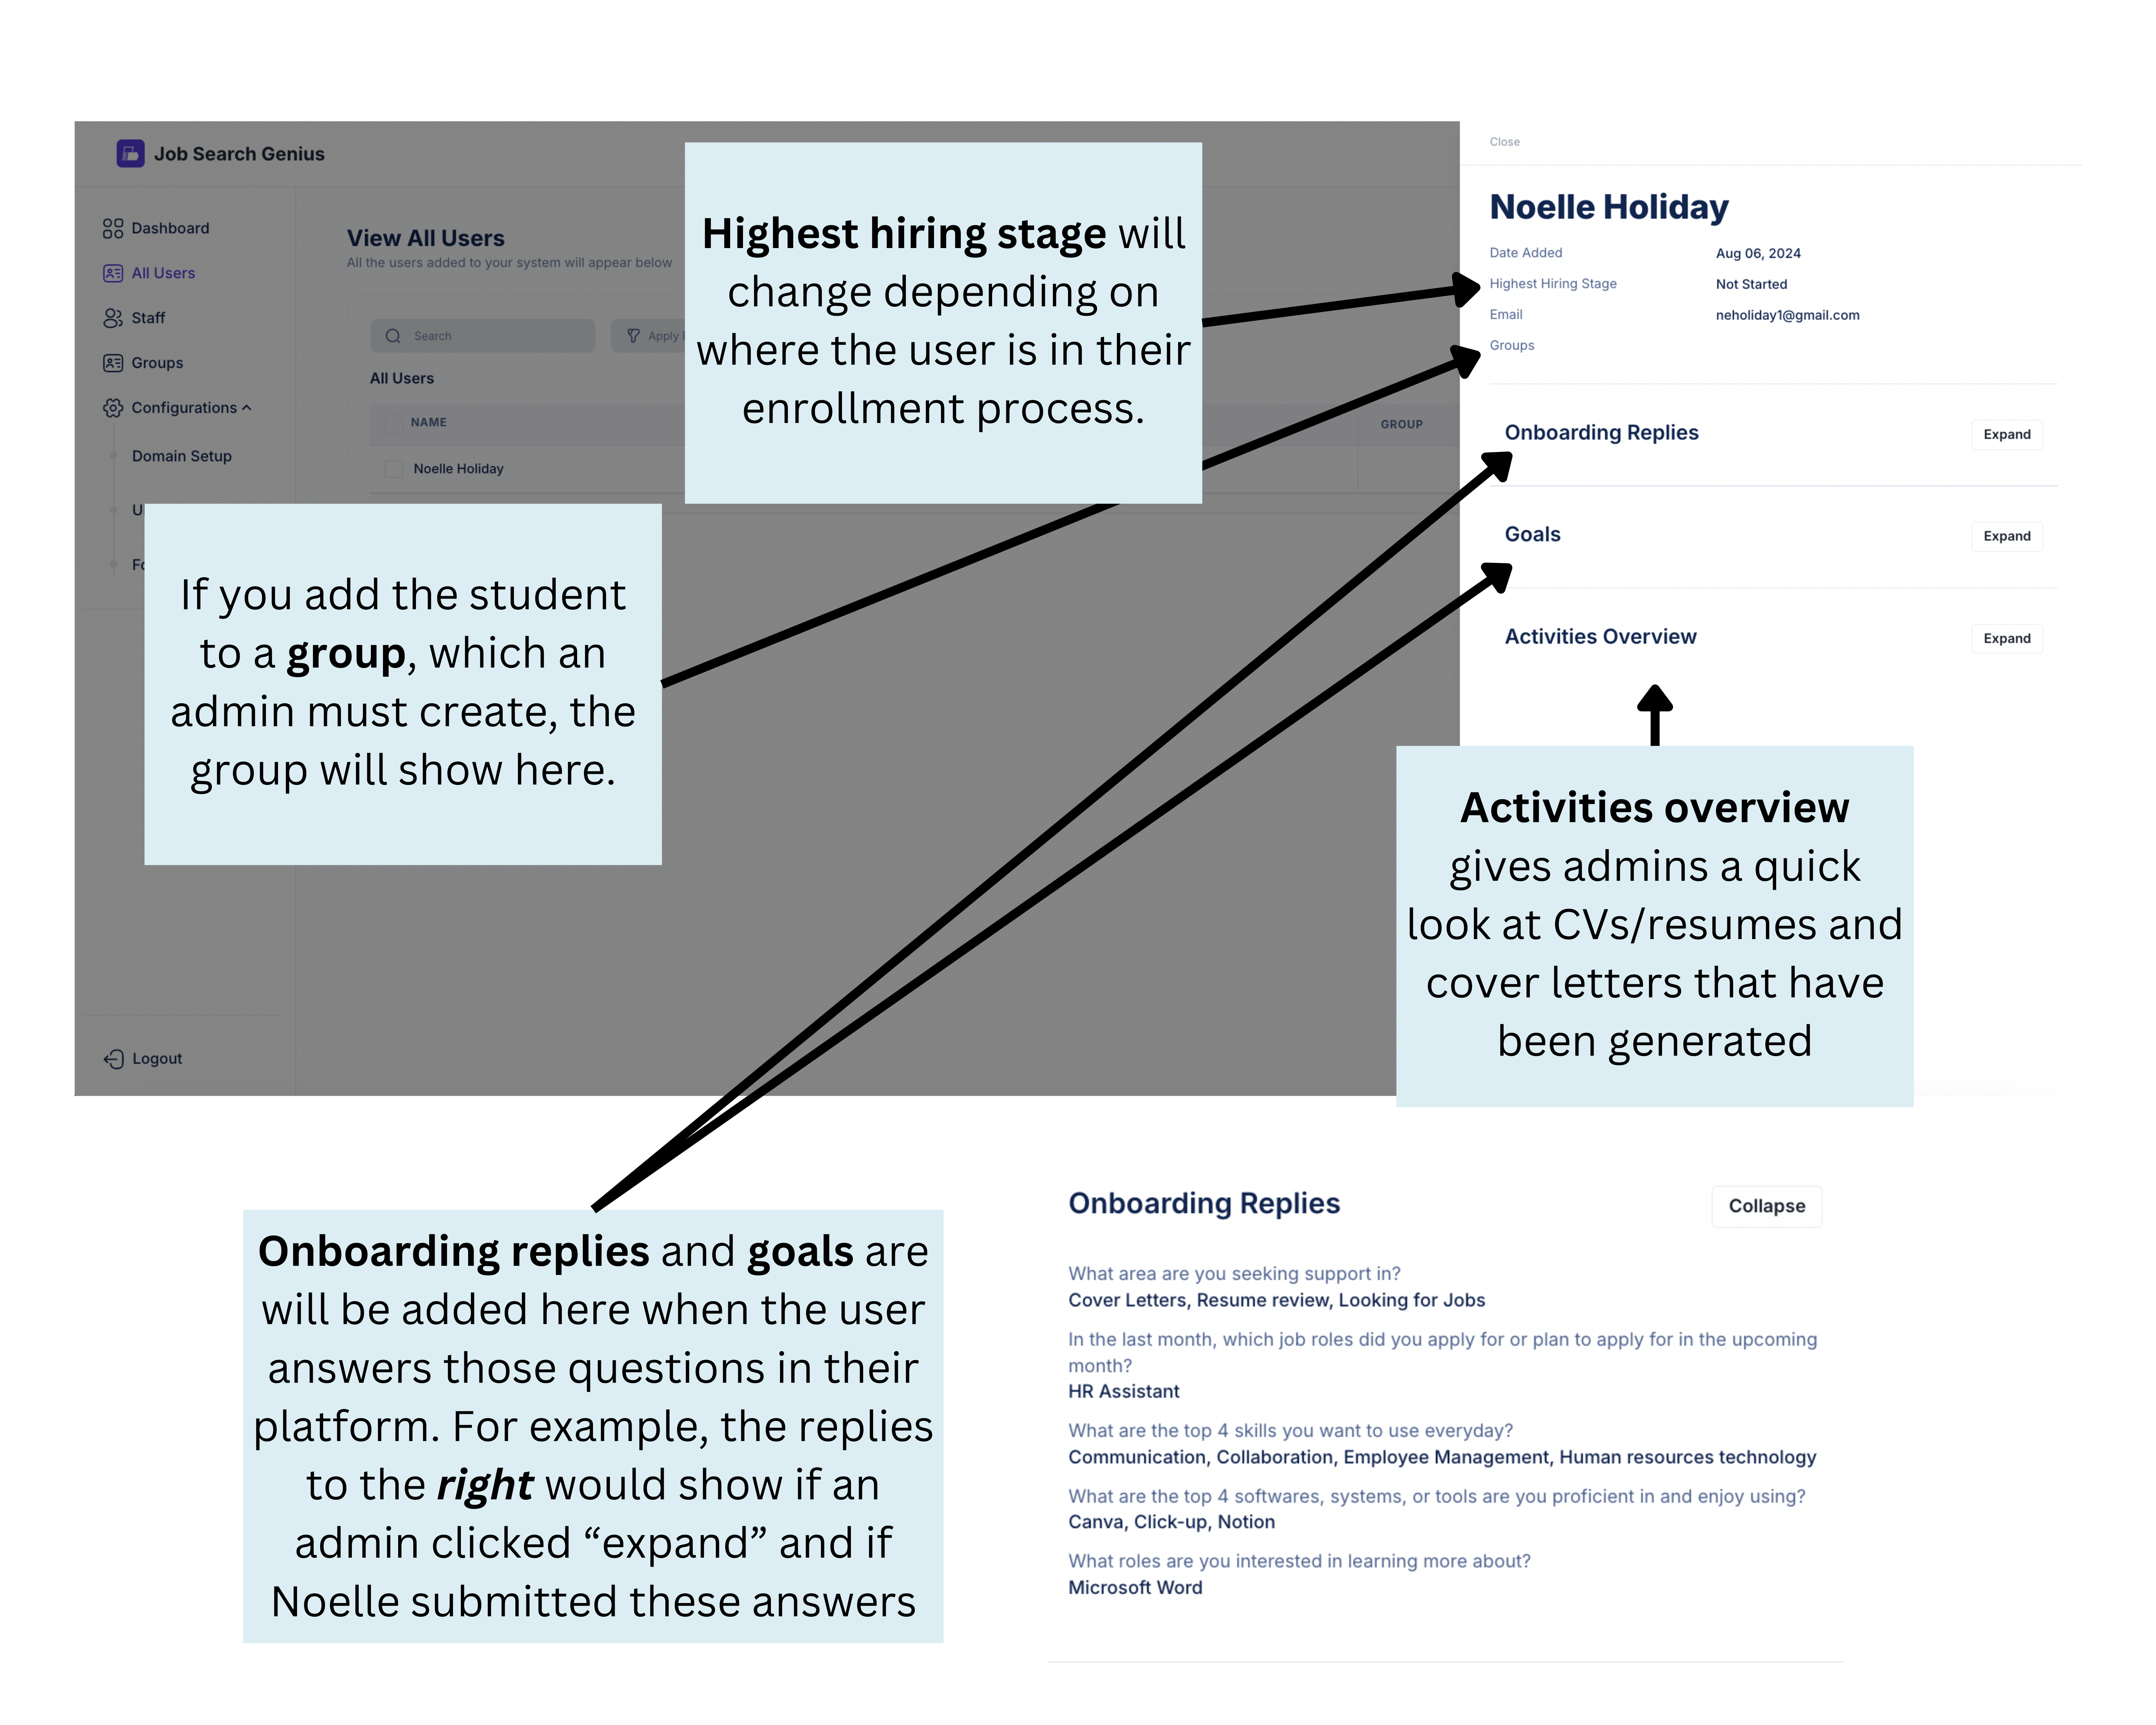
Viewing user information. If you click anywhere in the User's row, the pop up on the right, as shown below, will appear. See the blue boxes in the last image below for an explanation of the various elements in the pop up.
Sending a Reminder to an Inactive User
If a user appears with an Inactive status, admins can quickly send them a reminder directly from the All Users page.
To do this, click on the user’s name from the user list. This will open the user details panel on the right side of the screen. From there, you can view the user’s invitation status and see whether a reminder can be sent.
If the user has already been invited, the system will display a message confirming that the invitation has been sent. You can send another reminder after 24 hours by clicking the Send Reminder button once it becomes available.
Steps to Send a Reminder
- Go to the Admin Dashboard.
- Click All Users from the left-side menu.
- Locate the user with an Inactive status.
- Click the user’s name.
- Review the user details panel.
- Click Send Reminder if the option is available.
This helps admins follow up with users who have not yet activated their accounts or completed their invitation process.