
1️⃣ Set Up Your Base Domain
This step is required.
- Enter a subdomain under yourjobsearchgenius.ai.
- Example 1: if your company is WriteSea, you might enter “writesea”. The portal link would then be writesea.yourjobsearchgenius.ai.
- Example 2: if your school is called NH University, you might enter "nhuniversity". The portal link would then be nhuniversity.yourjobsearchgenius.ai. See the example as it would look on the platform setup screen:
Depiction of base domain setup:
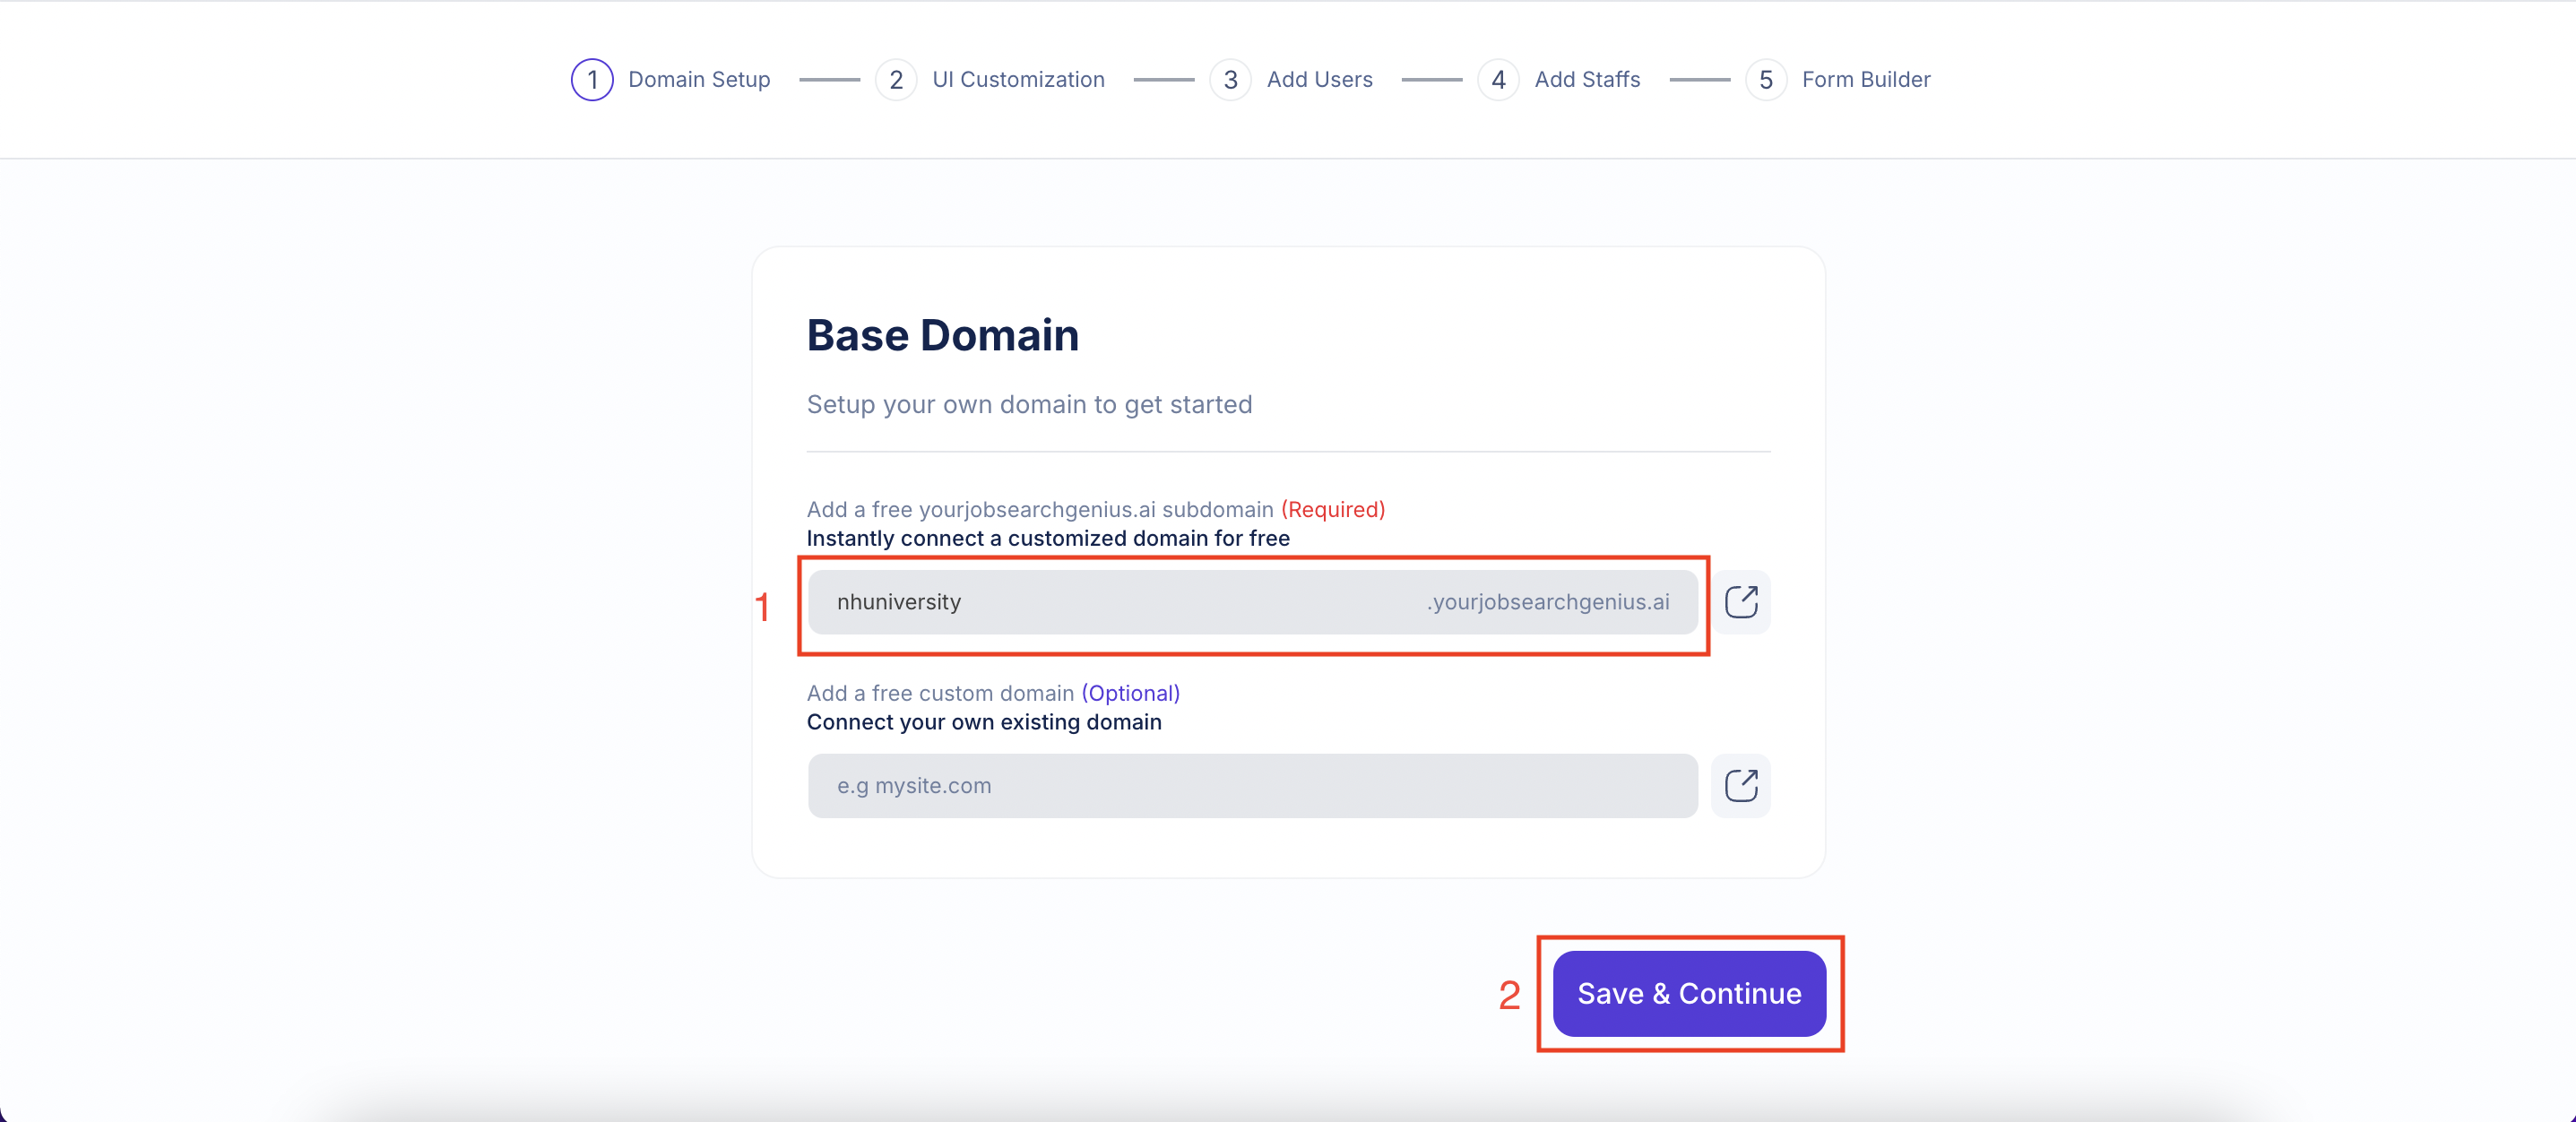
- Click Save & Continue (show in the red box above)
2️⃣ Complete Custom Domain Setup
This step is optional but we highly recommend completing this step.
If not now, we advise you work with your IT department to set this up before you add users.
Connecting Job Search Genius to your custom domain will prevent access issues that can be caused by any limits that your institution has on student and faculty internet access.
This step will allow you to create a portal URL that includes your institution's name.
Part 1: Connecting your domain
- If you want to connect Job Seach Genius to an unused subdomain under your root domain, type the subdomain you want to use in the bottom box. For example, if your domain is nhuniversity.com, you could choose ONE of these to type into the second box:
- app.nhuniversity.com
- dashboard.nhuniversity.com
- portal.nhuniversity.com
- You cannot simply put your domain in this box. It needs to be a subdomain that you are not already using, like those shared in the list above.
- Click "Save & Continue."
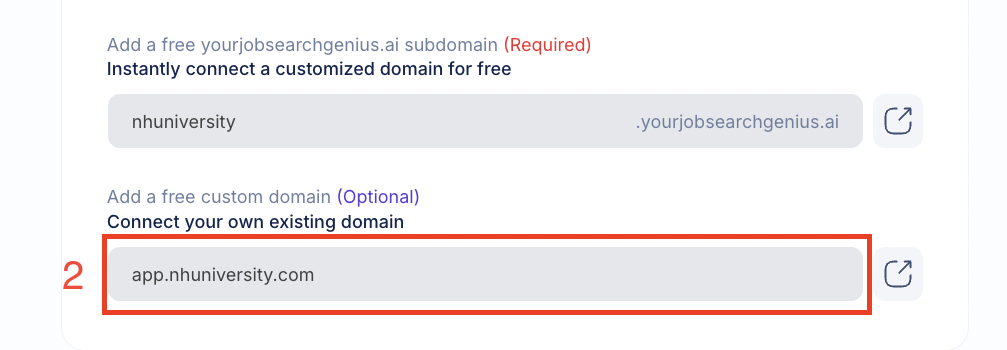
The above is a view of where you type a subdomain.
After this, Custom Domain Setup Instructions will appear on your screen.
Part 2: Completing custom domain setup
Once the Custom Domain Setup Instructions appear, follow these directions:
- Use the records to configure the CNAME keys and values in your domain settings. All records need to be added for the domain to function properly.
- For detailed instructions on configuring CNAME records, please check with your domain registrar (e.g., GoDaddy, Cloudflare, Namecheap, etc.).
- Once you add the CNAME and TXT records to your DNS, come back to the portal and click "Verify" to check the subdomain status.
- After the CNAME records are successfully added, green check marks will appear when you click "Verify." If you see red Xs, the records have not been correctly configured.
Here are examples of how to for add DNS records in major domain registrars:
GoDaddy:
- Instruction from GoDaddy
- Video (from a third party)
CloudFlare:
- Instruction from CloudFlare
- Video (from a third party)
Namecheap:
- Instruction from Namecheap
- Video (from a third party)
.png)
The above is a depiction of the instructions that appear when you click save and continue on the previous screen. You use these records to complete this section.
Troubleshooting:
If you are having issues getting the records to verify, you can try the following:
- You may need to remove the ending of the host values from all five records. For example, instead of "mail.app.careerstodayabc.com", you may need to just put "mail.app". Repeat this for all the records.
- Re-enter the verification record: It's possible that the verification record was entered incorrectly
- Wait: It may take at least 10 minutes for the domains to verify. Keep returning to the Job Search Genius platform and clicking "Verify."
3️⃣ Custom System Emails
After you complete domain setup, you will see the email address email that system notifications come from. This is the email address where notifications to customers will come from. Copy this and save it for later.
