
1. Feature Overview
The Groups module allows institution administrators to organize users and staff into structured collections such as cohorts, classes, programs, or teams.
Each group includes:
- Group name
- Optional description
- Tags for categorization
- Group type (User Group or Staff Group)
- Unique Group ID
Groups also support:
- Member management
- Staff assignment
- Bulk CSV uploads
- Integration with global user imports
2. Groups List Page
Navigation: Sidebar → Groups
The Groups list page displays all existing groups in a table view. If no groups exist, an empty state with a Create Group button appears.
Once groups are created, the table includes:
| Column | Description |
|---|---|
| Group Name | Displays group name with a copyable Group ID below it |
| Group Type | Indicates User Group or Staff Group |
| Tags | Tags associated with the group |
| Created On | Group creation date |
| Updated On | Last modification date |
| Actions | Menu with View / Edit / Delete options |
Pagination
- Rows per page: 10, 25, 50, 100
- Navigation: Prev / Next
3. Row Actions
Click the three-dot (⋯) menu in the Actions column.
| Action | Description |
|---|---|
| View Group Detail | Opens full group details page |
| Edit Group | Edit name, description, tags |
| Delete Group | Permanently removes the group |
⚠️ Note: Deletion is permanent and cannot be undone.
4. Create a New Group
Click Create New Group to open the creation form.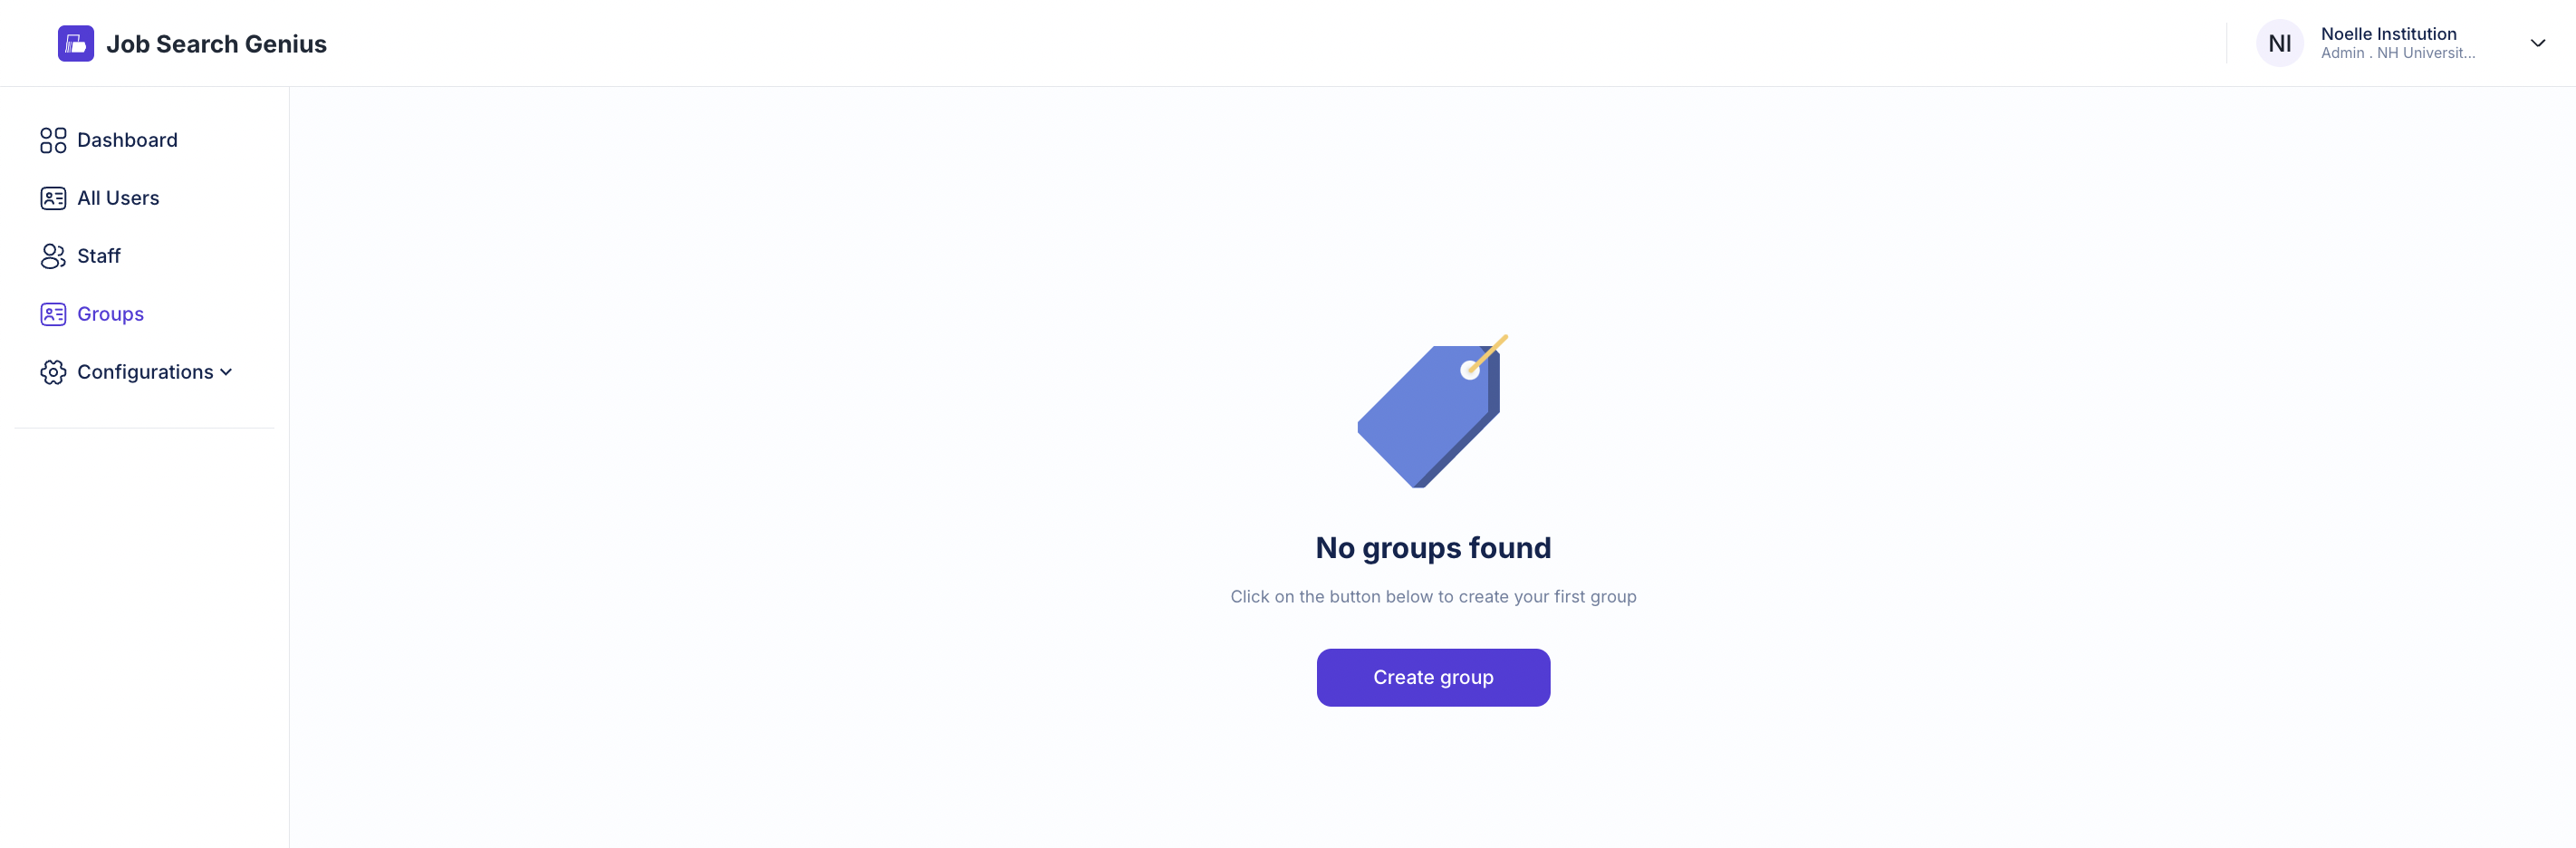
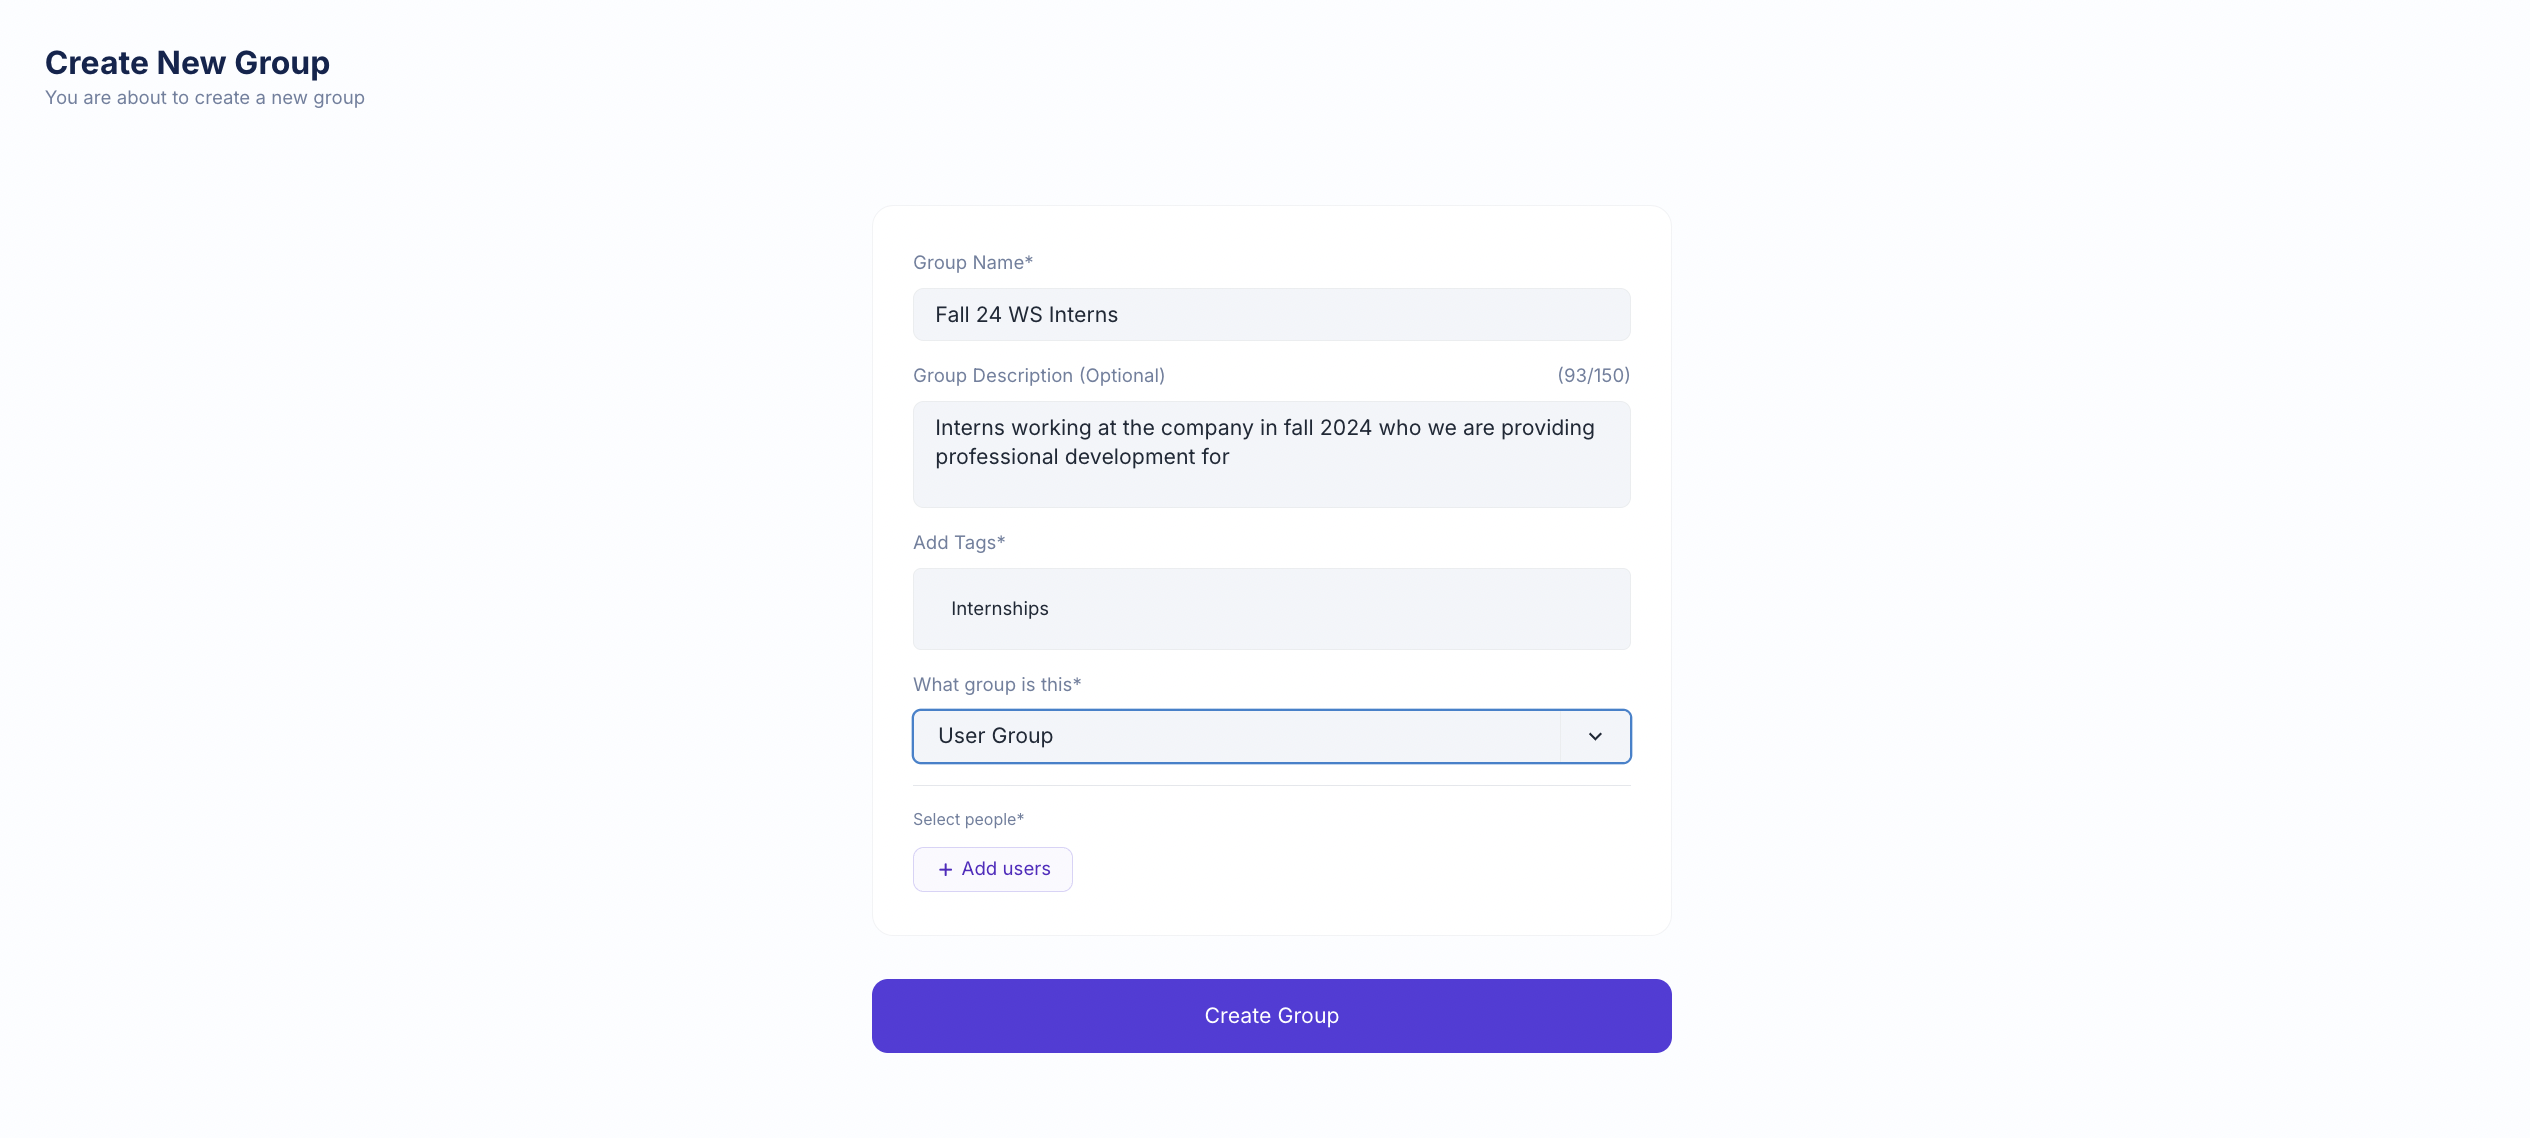
Fields
| Field | Type | Required | Description |
|---|---|---|---|
| Group Name | Text | Yes | Name of the group |
| Group Description | Textarea | No | Max 150 characters |
| Tags | Tag input | Yes | Search or create tags |
| Group Type | Dropdown | Yes | User Group or Staff Group |
Steps
- Click Create New Group
- Enter group name
- Add optional description
- Add tags (type 3+ characters to search/create)
- Select group type
- Click Create Group
5. Edit a Group
Click Edit Group from the actions menu.
You can update:
- Group name
- Description
- Tags
Important Rules:
- Group Type cannot be changed after creation
- Tags appear as removable chips
Click Update Group to save changes.
6. Group Detail Page
Path: /groups/{id}
The Group Detail page is the central hub for managing a group.
It includes:
- Group name and type badge
- Assigned staff section
- Tags section
- Members table
- Action buttons:
- Assign Staff
- Upload History
7. Managing Members
The Members section allows full control over group membership.
Features:
- Search members by name/email
- Filter by status:
- All
- Active
- Invited
- Deactivated
- Pagination controls
- Bulk selection & removal
- Individual removal option
Member Table Columns:
- Name
- Status
- Actions (Remove)
Add Members
Click Add Members to open the selection modal.
You can:
- Search users
- Filter by status
- View existing group assignments
- Select multiple users
- Add them to the group
8. Assign Staff to a Group
Click Assign Staff to open the staff assignment modal.
You can:
- Search staff members
- Select multiple staff users
- Use “Available to all” option
- Assign staff to the group
Assigned staff appear in the Group Detail page.
9. Bulk Member Upload (CSV)
Click Upload CSV inside a group to bulk add members.
Upload Features:
- Drag & drop or file upload
- Max file size: 10 MB
- Download sample template available
CSV Format (Important)
This is group-level format (different from global import):
Each row must contain:
FirstName;LastName;EmailExample:
John;Doe;john@example.com
Jane;Smith;jane@example.com
10. Upload History
Click Upload History to view past uploads.
You can:
- Track upload status
- View processing history
- Identify failed or completed uploads
Empty state message appears when no uploads exist.
11. Group IDs & Global User Import
Each group has a unique Group ID displayed under the group name.
Usage:
Group IDs are used during global user import to assign users to groups.
Format:
Comma-separated inside quotes:
"groupId1,groupId2,groupId3"Behavior:
- Users are added to listed groups
- Users are removed from groups not listed (on re-import)
- Leaving empty assigns no groups
12. Key Behaviors & Business Rules
- Group Name, Tags, and Group Type are required
- Description is optional (max 150 characters)
- Group Type cannot be edited after creation
- Tags support search and creation (3+ characters)
- Group IDs are unique and copyable
- Two CSV formats exist:
- Group CSV: semicolon-separated
- Global CSV: comma-separated
- Member statuses: invited, active, deactivated
- Deleting a group is permanent
- Bulk actions are supported for members and staff
13. Navigation Quick Reference
| Action | Path |
|---|---|
| View Groups | Sidebar → Groups |
| Create Group | Groups → Create New Group |
| View Details | Groups → Click row or View |
| Edit Group | Groups → ⋯ → Edit |
| Delete Group | Groups → ⋯ → Delete |
| Add Members | Group Detail → Add Members |
| Upload CSV | Group Detail → Upload CSV |
| Assign Staff | Group Detail → Assign Staff |
| Upload History | Group Detail → Upload History |
| Copy Group ID | Groups list → Under group name |
Conclusion
The Groups module provides a structured way to organize users and staff within WriteSea. It supports flexible grouping, efficient bulk management, and seamless integration with user import workflows, making it a core feature for institutional administration.